-
Kernel
-
Plugins
-
Release Notes
The program has the following types of web-interface:
For calling of the running system use URL: http://<host>:<port>; where:
-
<host> - host name or IP address of the server;
-
<port> - port, by default is 9088.
Configuration process has to be started from User interface.
User
The interface is available by suffix /user. This is the main application’s UI. After creation database has only one superuser admin with password admin.
| Change them after the first log in. The user with ID=1 is a special one, permissions are ignored for him. |
Shell
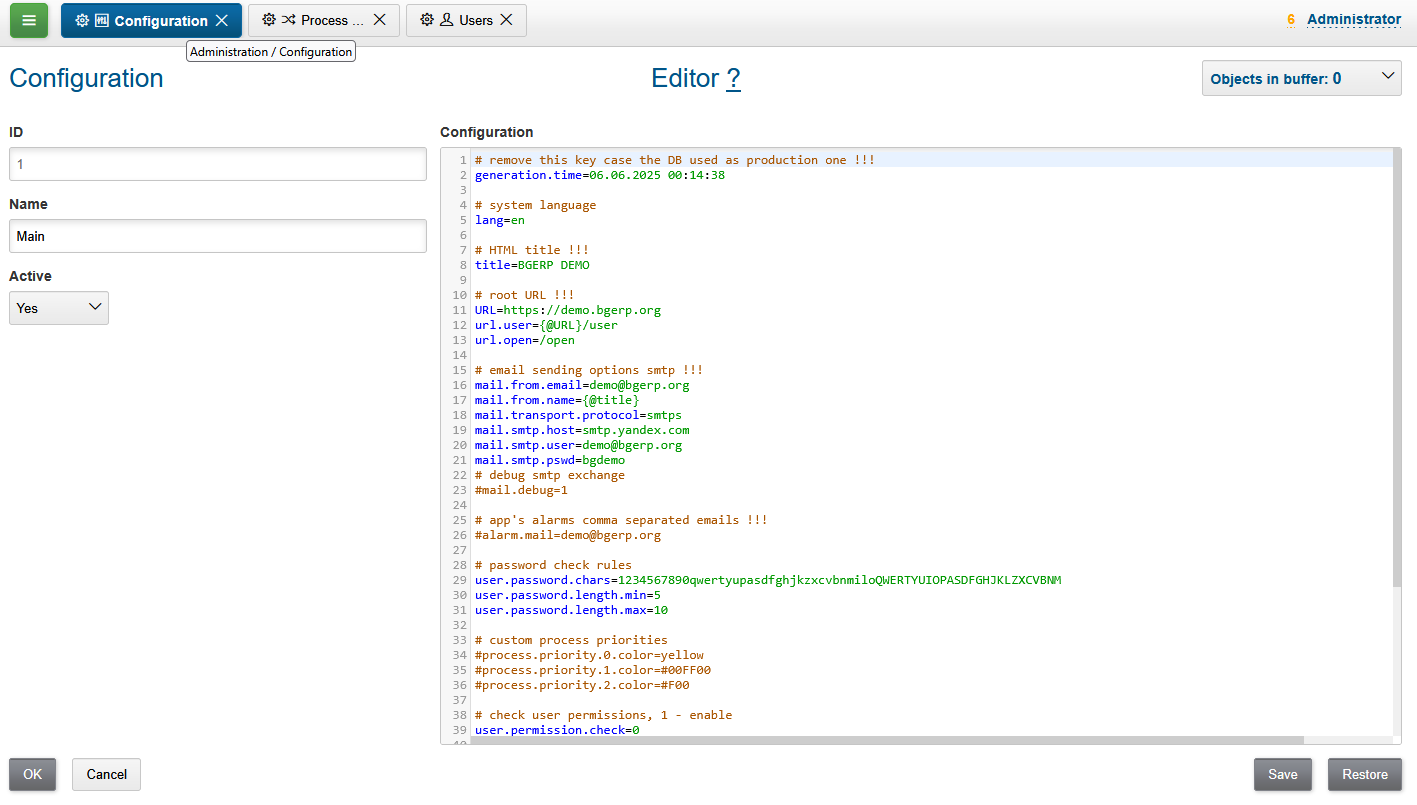
Menu
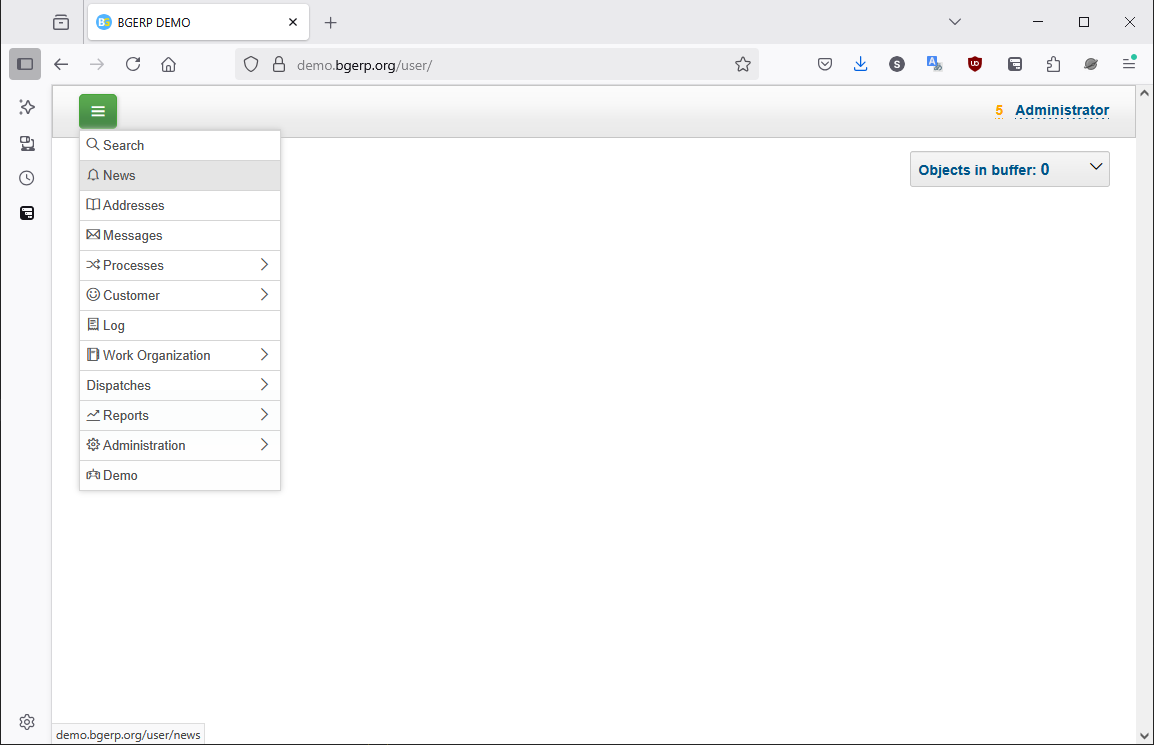
The green button in the top-left corner opens drop-down Menu for running tools, allowed for the current user.
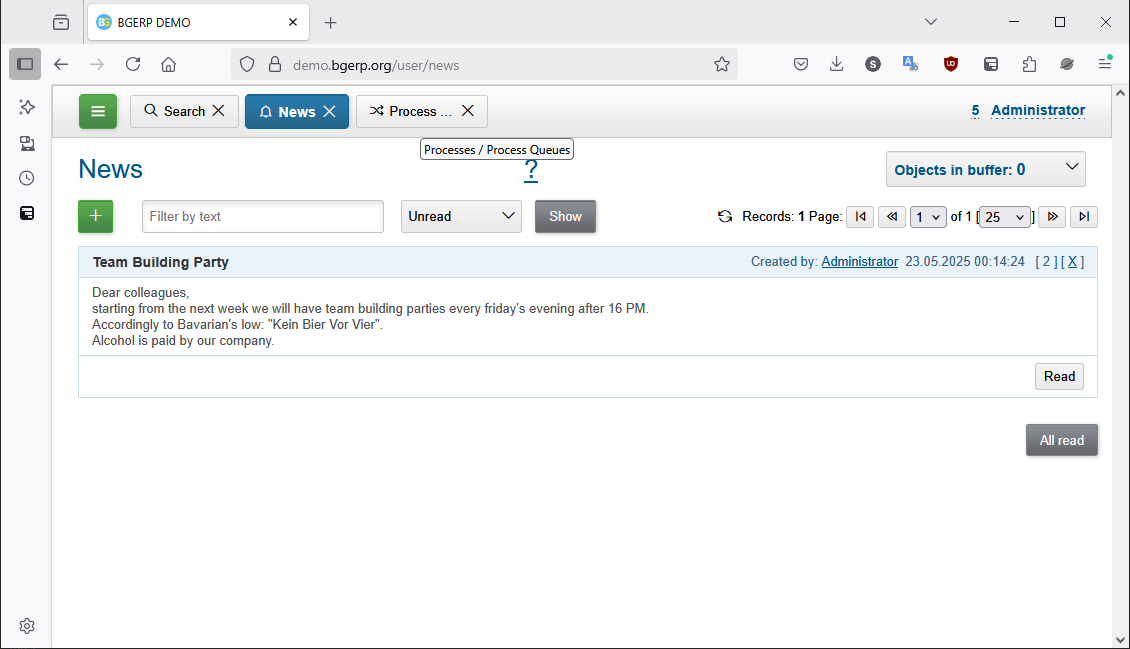
Toolbar
Each running tool has a button on toolbar, the active tool marked with blue background. Placing mouse pointer over a toolbar button shows full menu path to the related tool, Processes / Process Queues on the screen.
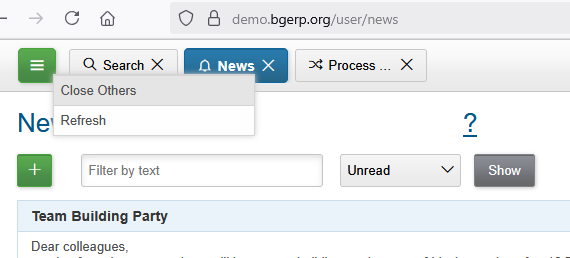
No needed tools can be closed by click to grey crosses on right toolbar buttons, or by right-click popup menu on active tool button.
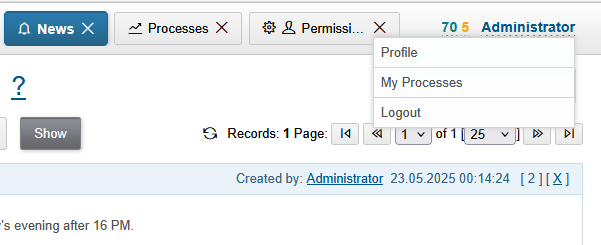
Notifications
Right to the toolbar can be displayed one or multiple user-configured process counters, showing quantity interesting processes, 70 for the screen. After is placed number of notifications, blinking in case of changing it. In the drop-down menu, opened after mouse click on notification counter, presented separated parts of the number, occurred in different tools. Click to the menu item opens the mentioned tool with unread news or messages.

Account
In the top right corner has shown the name of the current user. Click on it opens drop-down menu with options for see own profile, processes or terminate the session.
Topline
Shows the title from the active object or tool, click on that refreshes the active content area.
| The prefix O points to open link of the active content. |
In center of the topline, right from the title, placed so-named State area, there can be the related documentation link with ? char.
Or string representing the current state of active content.
There is also may be placed some controls of the active tool.
Buffer
The Buffer contains list of inactive objects, previously being opened and not explicitly closed by switching activity to another object or tool. The size of the buffer is limited, last placed object placed on the top, others are shifted down, closing the oldest if the limit size has been reached.

Objects in buffer are used for quickly re-open them or object selection in some operations, like link creation.
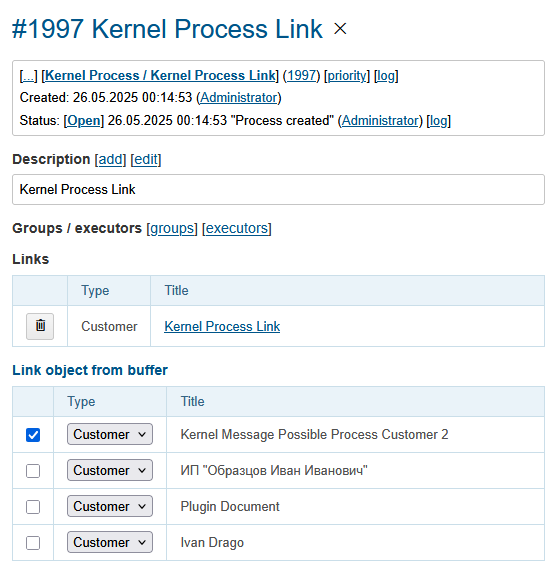
No more needed objects in buffer may be closed by click on grey crosses at right area.
Content
Tool
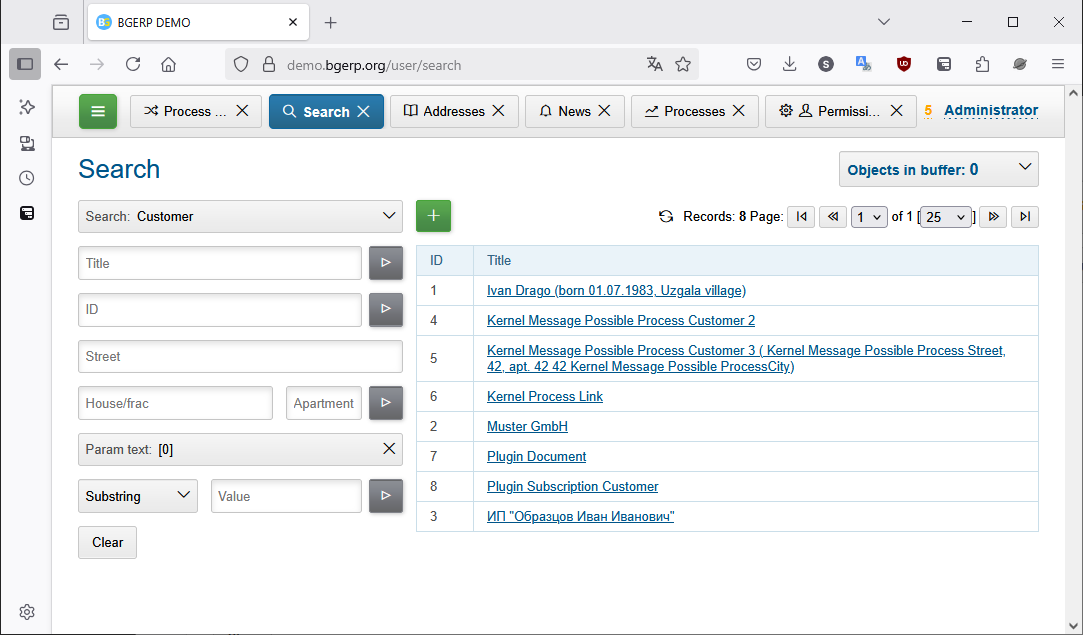
A Tool acts like an application inside the application and allows perform different data manipulation. Each tool can be opened only once inside a browser window, re-opening just makes it active. Beside of menu, switching active tool may be performed by click on an inactive toolbar button, or using Back and Forward browser navigation commands. The last option is possible, because any tool has an unique location URL, e.g.: /user/search, /user/news, /user/process/queue
Object
An Object represents a set of related data: process, customer, user profile or some another from a plugin. Unlike tools, many objects of the same type can be opened in same time, their ID ends the object’s browser URL after # char.
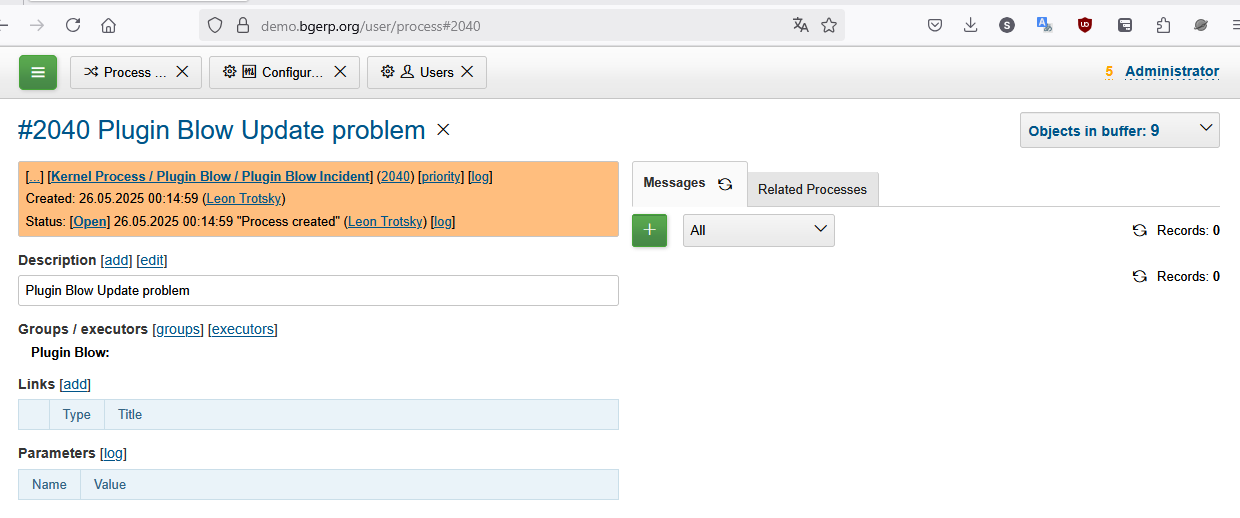
In active content area can be placed only one tool, or an object, like on the screen above. Inactivated objects placed it buffer.
Element
Button
Button colors have the following meanings.
| Button view | Functionality |
|---|---|

|
Greens call an editor for adding new entity. |

|
Browns send request to server. |

|
Shown progress indicator during server processing. |

|
Whites do all other actions. |
Tooltip
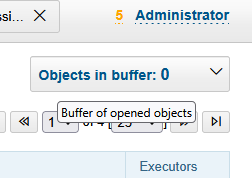
When hovering mouse pointer on some interface elements, additional information is shown. As example on toolbar buttons displayed a full menu path, for object buffer shown just a short hint.
For input fields there might be the logic’s details.
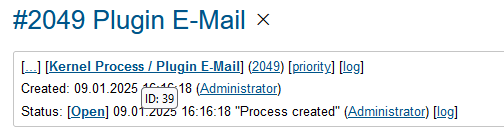
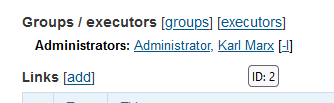
In many cases these tips contain entity IDs.
Entity IDs
IDs are unique numbers, used for identification entities over the system. They are widely used in configurations.
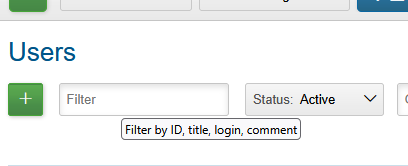
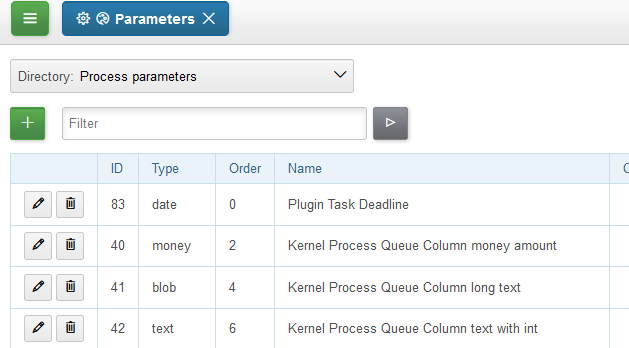
In admin tools the IDs are shown normally as separated table column.
For regular users the are hidden as HTML tooltips, shown only when mouse is over the item.
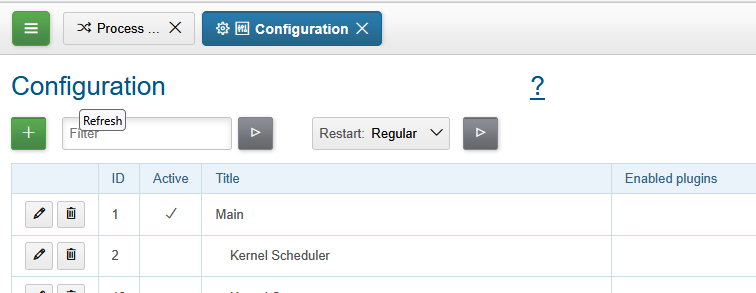
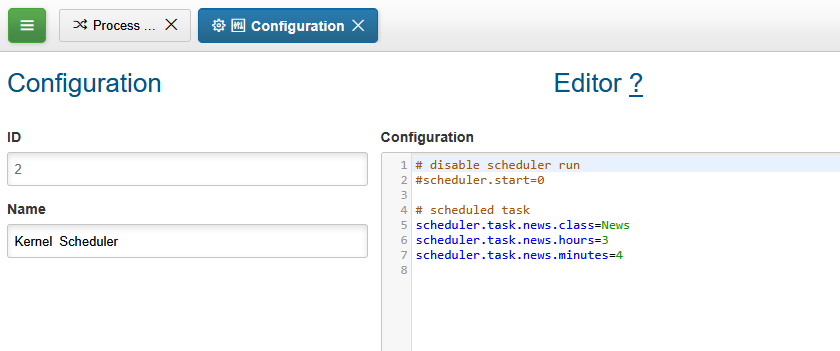
Configuration
A large number of rarely changing system behavior settings are placed in configurations. A configuration is a text block consisting of entries in the format: <key>=<value>; any key must be used only once. Each line may contain only one such entry; a # character at the beginning of a line indicates a comment of the line. After any modification in configuration, editor becomes the red border.
Multiline
In configuration values can be stored multiline values, the way is actively used in JEXL expressions.
key=<<END
Value Line 1
#Value Line 2
Value Line 3
END
The value will be: Value Line 1Value Line 3, line brakes are excluded. Instead of END any other string can be used.
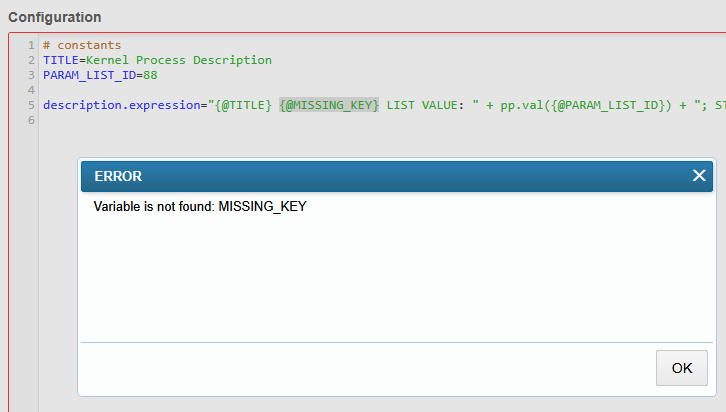
Variable
In configuration lines, it is possible to substitute previously specified values using macros {@<key>}.

The existence of used variables is being validated during configurations' save.
| The visibility scope of any variable is restricted by its configuration, no matter of used includes. |
Counter
After parsing, a configuration is used by the system as a set of key-value pairs in which the order is not defined. If it is necessary to specify the order, additional numeric indexes are added to the keys.
key.1.id=1
key.1.title=Title1
key.2.id=2
key.2.title=Title2
When there are many such entries, maintaining the index can become difficult, especially when the entry numbers need to be changed. In this case, the index can be extracted into a separate variable and incremented using the inc macro. Below is an identical configuration where the indexes are extracted into a variable:
key.{@inc:cnt}.id=1
key.{@cnt}.title=Title1
key.{@inc:cnt}.id=2
key.{@cnt}.title=Title2
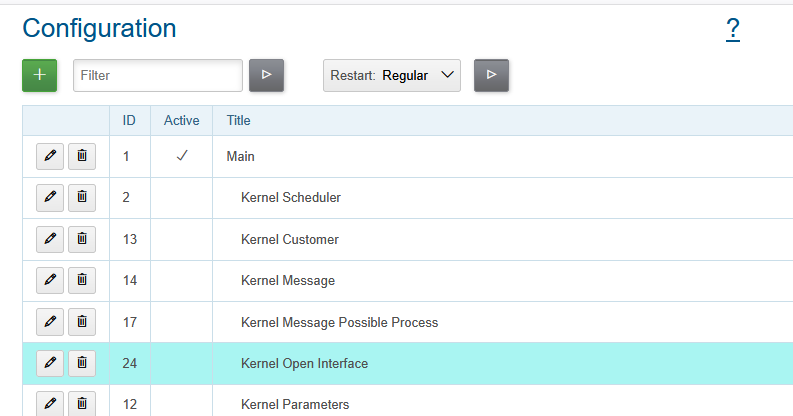
Include
Repeated parts of large configurations they can be extracted to includes. For that can be used any Server Configuration with separated ID. The main and active server configuration is normally broken down with many includes of different subsystems and plugins.
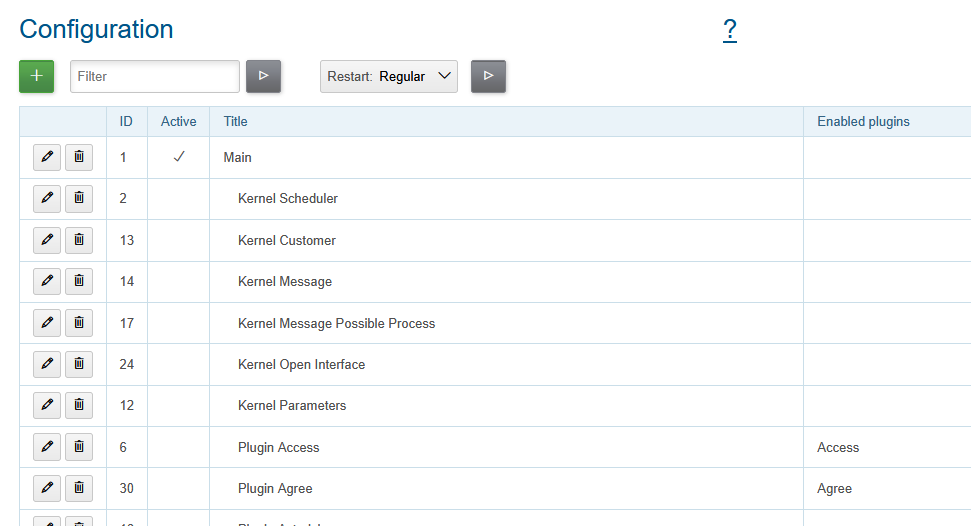
Except that, a separated server configuration can be user like a library in any other configuration, using instruction include.<ID>=1
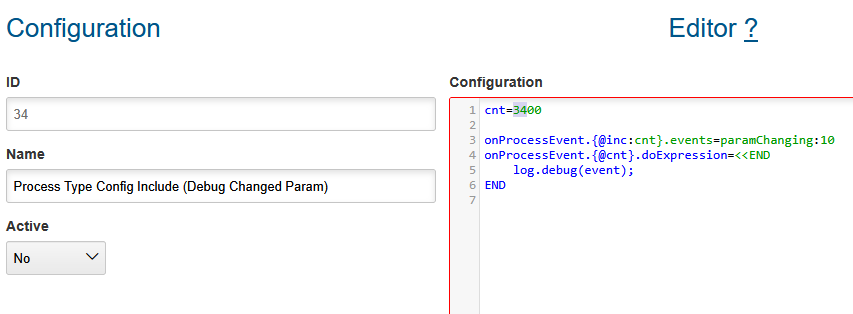
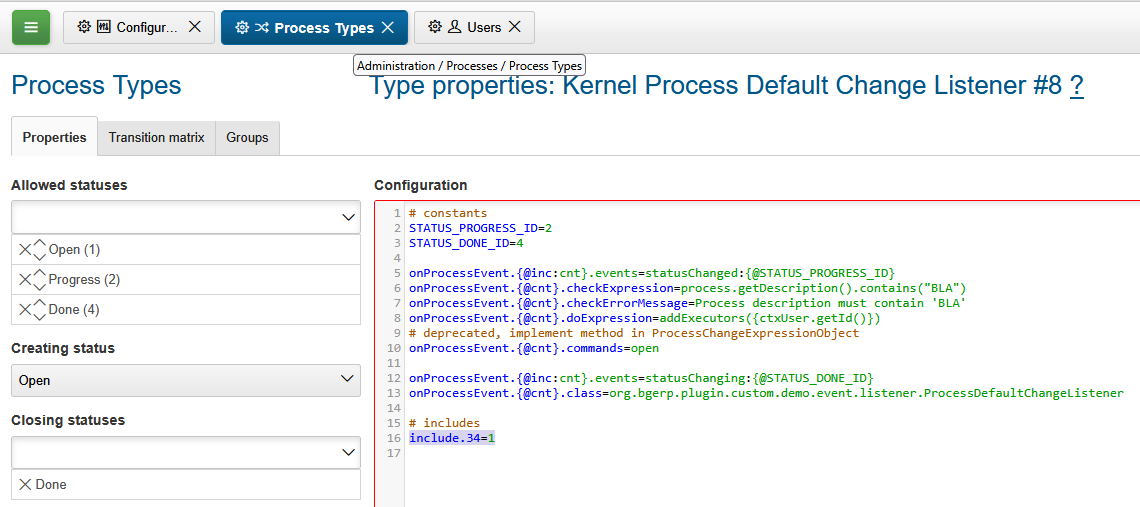
Note, how in the include was defined initial value of counter variable cnt. Using a unique ID of the included configuration multiplied by 100 ensures the uniqueness of key values in any location.
Concatenation
Except of simple assignment, a key value can be appended to the existing:
key=1
key+=,2
key+=,3
In this case the value for key will be 1,2,3. Together with includes the approach is used for appending to existing key values. If the keys' value is missing, it will be created on a first concatenation.
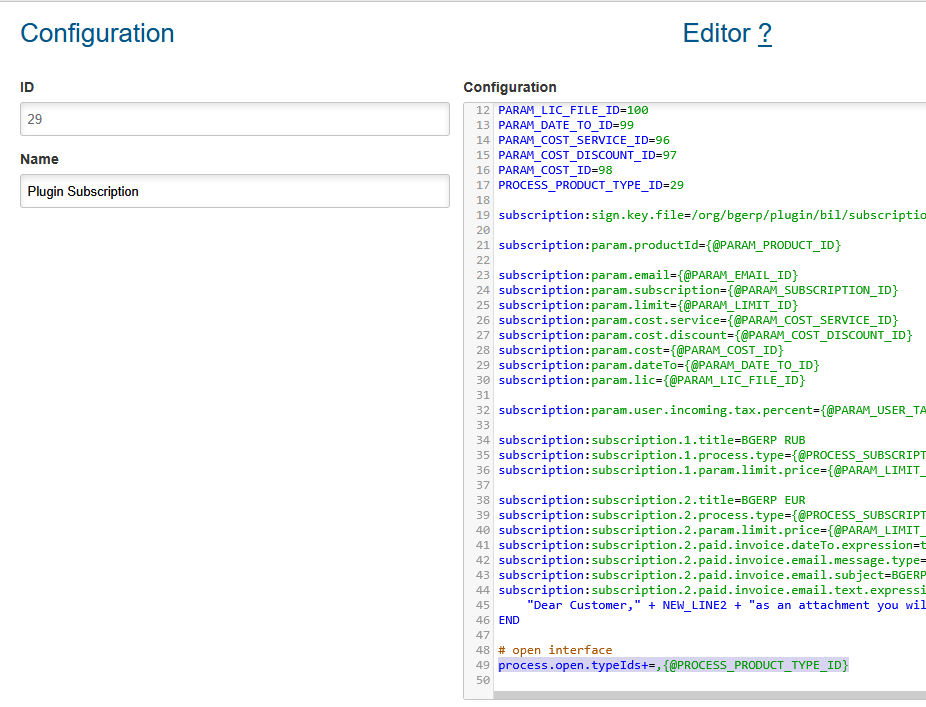
The both of configurations are included to the main ones and extend the same keys' value.
Mobile
The interface is available by suffix /usermob.
The interface provides access to process queues with limited functionality:
-
Filtering and sorting are strictly predefined;
-
Values in columns containing links (such as to a contractor or user) are displayed as plain text, similar to how they appear when printing the queue;
-
There is no pagination — it is assumed that the filter limits the full required set of processes for executors.
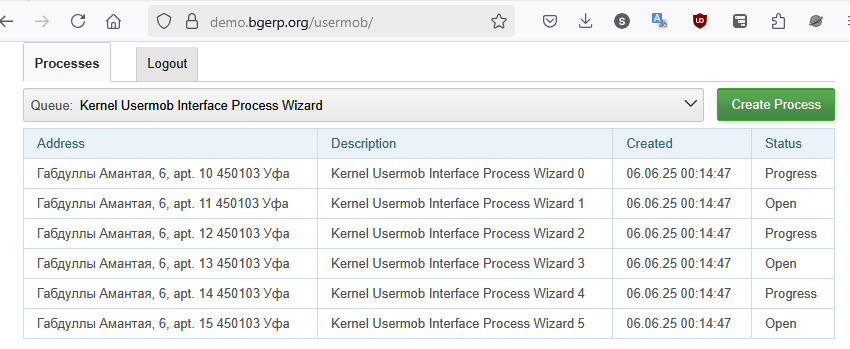
To consider the process queue as mobile, the following must be specified in its configuration:
showIn=usermob
| You can link:see (queue Kernel Usermob Interface Process Wizard) the feature operation in Demo System. |
Here is the configuration of the process queue from Demo:
// PzdcDoc snippet of: 'Kernel Usermob Interface Process Wizard queue configuration', lines: 1 - 27

showIn=usermob

filter.{@inc:cnt}.type=openClose
filter.{@cnt}.values=open
filter.{@inc:cnt}.type=executors
filter.{@cnt}.values=current

column.1.title=Address
column.1.value=param:{@PROCESS_PARAM_ADDRESS_ID}
column.3.title=Description
column.3.value=description
column.5.title=Created
column.5.value=create_dt
column.7.title=Status
column.7.value=status_title

sort.mode.1.columnId=7
sort.mode.1.title=Status (HIDDEN)
sort.mode.2.columnId=5
sort.mode.2.title=Created time desc (HIDDEN)
sort.mode.2.desc=1

sort.combo.count=2
sort.combo.1.value=1
sort.combo.2.value=2

createAllowedProcessList={@PROCESS_TYPE_ID}:Create Process
Opening processes in mobile queues performed via click on a table row, process editor implemented using Wizard.
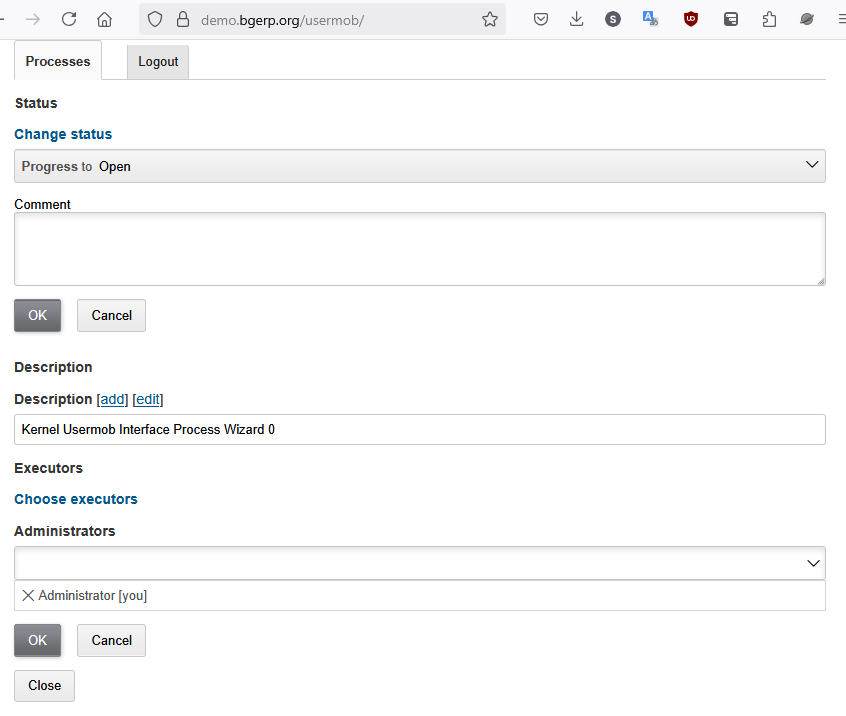
Process creation has been done via wizard as well, each process type allowed for creation has to be defined as semicolon-separated pairs <PROCESS_TYPE_ID1>:<TITLE1>;<PROCESS_TYPE_ID2>:<TITLE2> in queue configuration with key createAllowedProcessList.
Open
The interface is available by suffix /open.
Configuration sample of NGINX for accessing it from outside network.
Beside of some kernel functionality, described below, this interface is also used by following plugins:
Config
Default <OPEN_URL> for accessing the open interface is /open that can be changed in configuration. It is recommended to make separated included configuration for configuring open interface.
# changed root <OPEN_URL>
#url.open=https://demo.bgerp.org/open
User Profile
For enabling showing user specific information by URL <OPEN_URL>/profile/<USER_ID>:
-
create user parameter with type list and value 1=Yes, ID of that is <ENABLE_PARAM_ID>;
-
add the following records in configuration.
user.open.enable.paramId=<ENABLE_PARAM_ID>
user.open.show.paramIds=<PARAM_IDS>
Where:
-
<PARAM_IDS> - comma-separated user parameter IDs to be shown, parameter type file is not supported
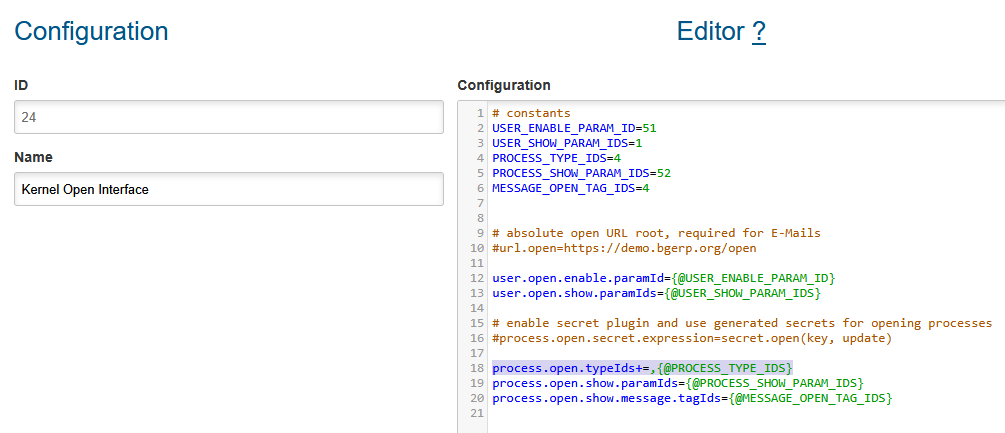
Process
| You can link:see (process Kernel Open Interface) the feature operation in Demo System. |
For enabling showing process information by URL <OPEN_URL>/process/<PROCESS_ID> define in configuration:
process.open.typeIds=<TYPE_IDS>
process.open.show.paramIds=<PARAM_IDS>
process.open.show.message.tagIds=<MESSAGE_TAG_IDS>
# optionally JEXL expression for handling access secrets
#process.open.secret.expression=<SECRET_EXPRESSION>
Where:
-
<TYPE_IDS> - comma-separated process type IDs to be shown;
-
<PARAM_IDS> - comma-separated process parameter IDs to be shown, parameter type file is not supported;
-
<MESSAGE_TAG_IDS> - comma-separated message tag IDs to be shown, * - show all tags;
-
<SECRET_EXPRESSION> - JEXL expression for secret handling, e.g using plugin secret.
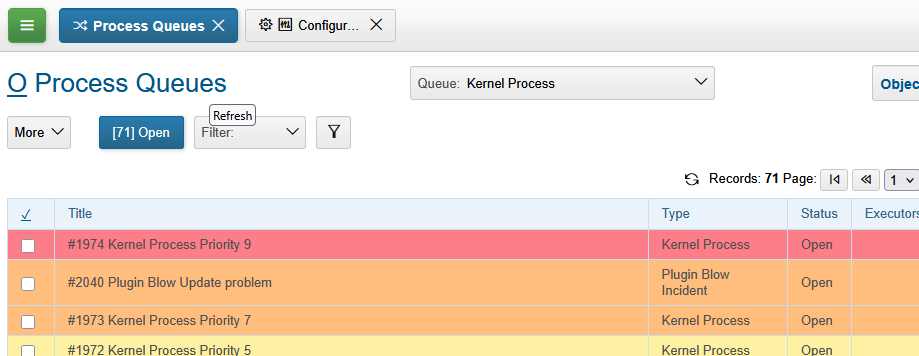
Process Queue
For enabling showing process queue by URL <OPEN_URL>/process/queue/<OPEN_NAME> define in configuration of the queue:
openUrl=<OPEN_NAME>
media.html.open.columns=<COLUMN_IDS>
Where:
-
<COLUMN_IDS> - comma-separated list of queue columns.
Localization
For localization of the Open Interface add HTTP request parameter lang=<LANG>, where <LANG> - shortcut of the wanted language.